
October 14th, 2020 by admin
Here is a guide to how you can use REC.VC to record a meeting on Google Meet.
Prerequisites
You’ll need the following to record a meeting on Google Meet using REC.VC:
We will in this guide cover how to use REC.VC with Pexip CVI as a Service to record a Google Meet. Note: The process is very similar for Pexip Infinity.
Google Meet enabled with support for third-party SIP endpoints/clients
The combination of Google Meet and Pexip CVI ensure that your SIP endpoints (Cisco, Polycom, Lifesize, etc) can call into a meeting on Google Meet.
In this context, REC.VC is simply another (virtual) SIP endpoint which you can instruct to call into a Google Meet for the purpose of capturing video, audio and any content shared in Google Meet.
How to record a Google Meet, step by step
1. Obtain the SIP address for the Google Meet
You can obtain the unique meeting SIP address for a Google meet in the following ways:
For scheduled meetings, unique meeting SIP address can be obtained by clicking on More joining options in the Calendar invite (for scheduled meetings) or by clicking on More numbers and room options while the meeting is in progress.
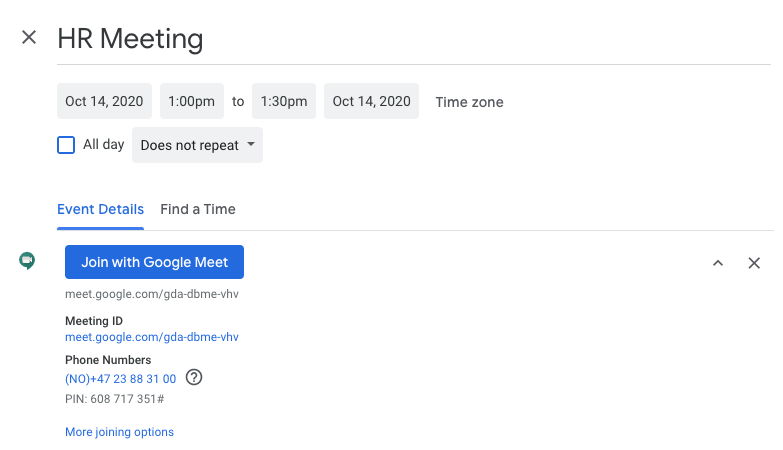 Calendar invite: Click on joining options
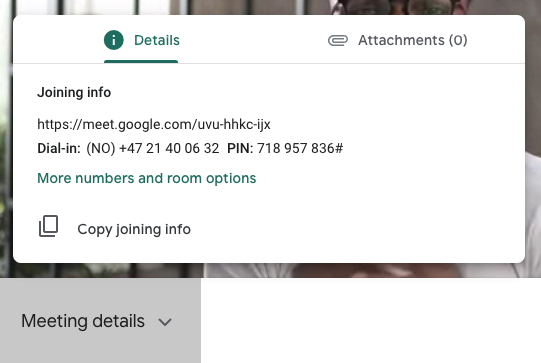 Meeting in progress: Click on More numbers and room options
When clicking on the link (before or during the meeting), you’ll get to a Google Meet page with two tabs: Dial-in numbers and Third-party systems. The unique meeting SIP address is listed under Third-party systems and has the following structure:
<unique-meeting-id>@gmeet.pexip.me
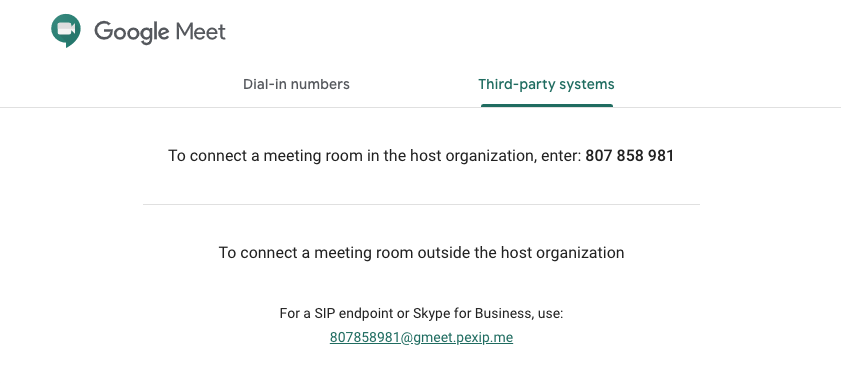 The unique meeting SIP address is listed under Third-party systems
2. Start recording the Google Meet
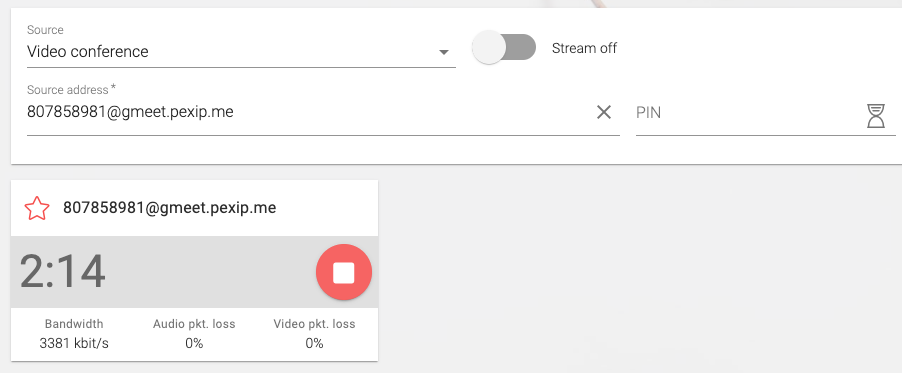
To start recording, access your REC.VC account and copy & paste the unique meeting SIP address (from step 1) to into the Source address field and click on the red RECORD button:
 REC.VC user interface: Add the unique meeting SIP address and click RECORD
REC.VC will then place a SIP call to the unique meeting address of the Google Meet. In the Google Meet user interface, you’ll be notified that your REC.VC recorder wants to join the meeting. REC.VC starts recording audio, video and content as soon as you Admit the recorder into Google Meet.
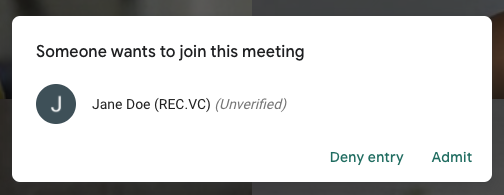 Google Meet user interface: Click on Admit to let REC.VC record the meeting
3. Stop recording the Google Meet
Whenever you want to stop recording, you can disconnect the REC.VC recorder in the Google Meet user interface by clicking on Remove from meeting, or click on the STOP button in the REC.VC user interface
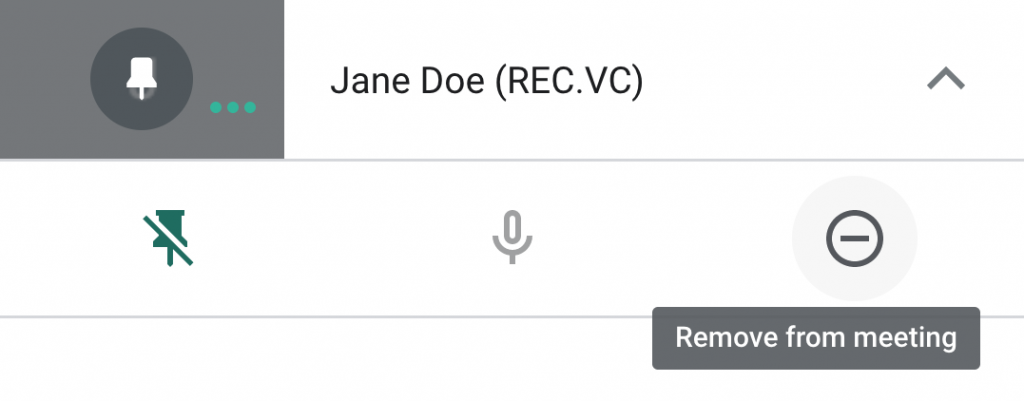 Google Meet user interface: Stop recording by removing recorder from meeting
4. Managing and sharing your recorded Google Meet meetings
The video tutorial below shows how you can manage, share, trim and delete your Google Meet recordings.
Posted in Uncategorized Tagged with: cvi, google meet, pexip, record meeting, recording
August 30th, 2018 by admin
Security has been and will always be a key component of the REC.VC cloud service.
We have over the last 3-4 months further enhanced the security framework by introducing several new features including a new additional security layer when sharing live stream and playback links with third-party viewers.
Here is how …
Playback links
REC.VC makes it easy for you to share a video recording with third-party while maintaining your desired level of security. To share one of your recordings, simply click on the Share icon:

The Share media window will then give you the following link options:
- Link lifetime (define when you want the link to expire):
- Custom (set expiry date)
- 24 hours
- One week
- One month
- Forever
- Link password (optional)
- Make video downloadable (includes download button in video player)
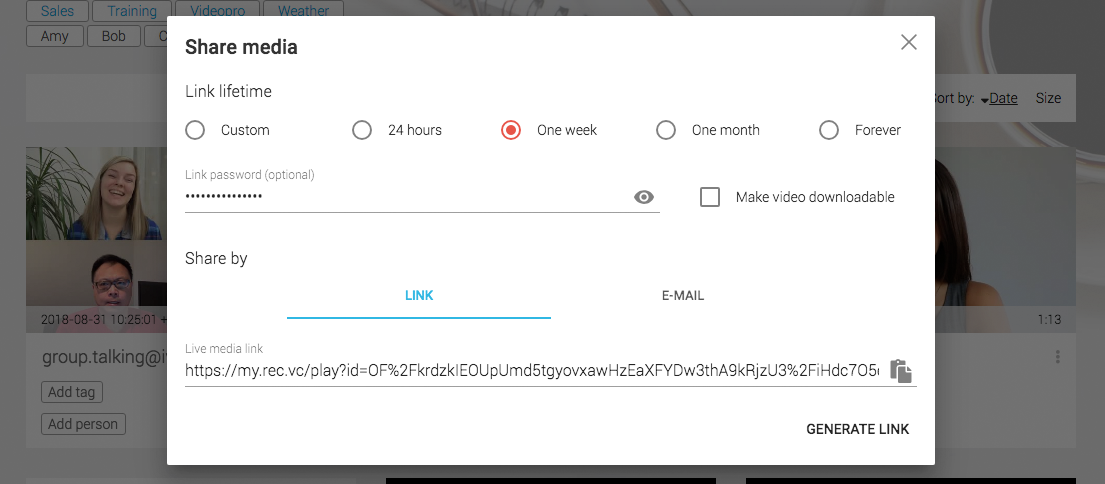
You can then decide if you want the copy & paste the unique enscrypted LINK or share it by E-MAIL to any e-mail recipients you add.
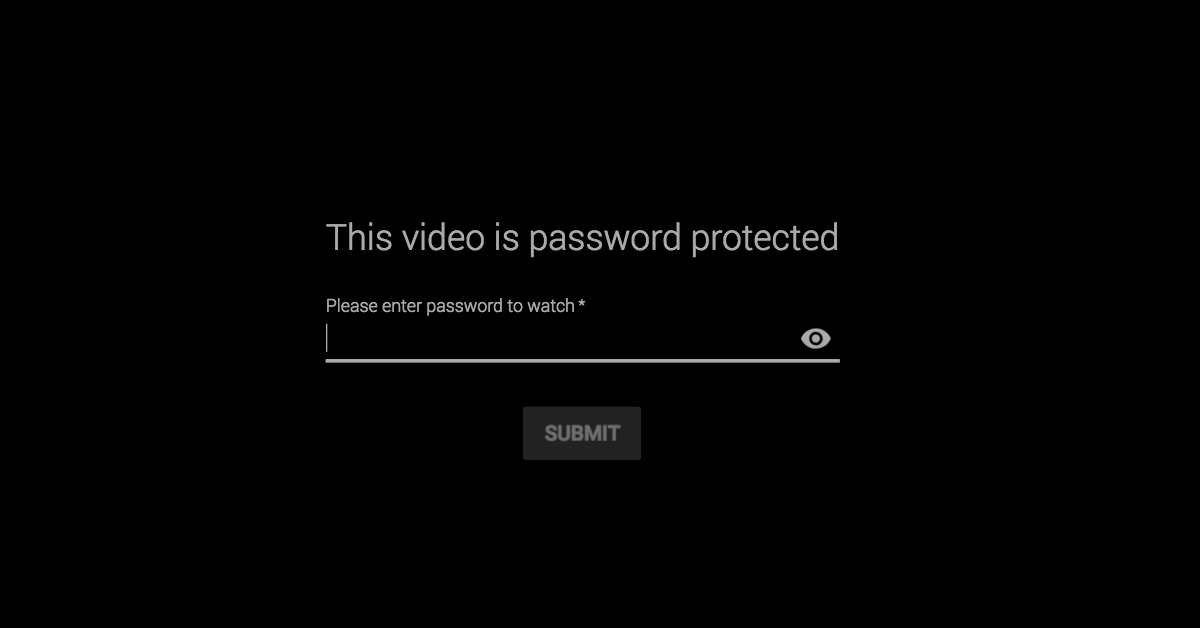
You can view a demo recording (no audio) with password protected link here ( password:Â Demo=1234).
Live streaming links
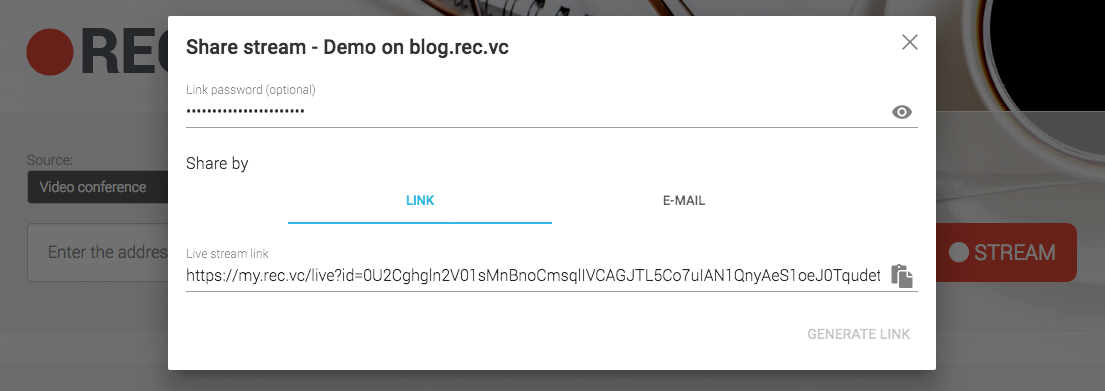
REC.VC makes it easy for any user (with live streaming permission set) to live stream from a video conference endpoint or virtual meeting room to hundreds or thousands of viewers. And with the latest enhancements, the live stream link can optionally be password protected.
First step is to Add new stream via the Stream drop down (you may also generate unique encrypted and password protected link on any existing Streams):

Once you have added the Stream title, you’ll get the Share stream window with the option to add Link password and generate a new encrypted and password protected link:
Posted in How to, New features, Security, Uncategorized Tagged with: Password, record meeting, Share
March 21st, 2018 by admin
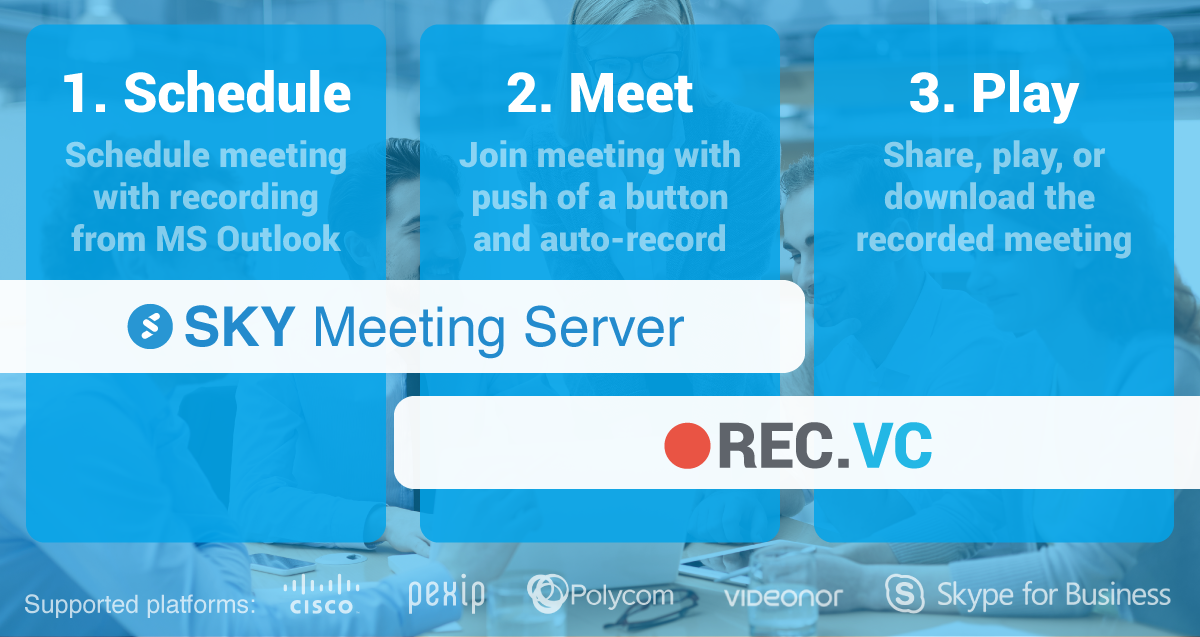
The Synergy SKY Meeting Server (SMS) makes it easy to schedule and join meetings with the push of a button. The REC.VC cloud service makes it easy for anyone to record & share their video meetings.
Together REC.VC and SMS make a powerful combo enabling users to:
- Schedule meetings with optional recording directly from native integration with Microsoft Outlook and Google G Suite.
- Join meetings using their preferred personal apps (Skype for Business, Spark, Pexip, etc), browser (WebRTC) or by walking into a meeting room with Cisco or Polycom and their respective One Button to Push and Click-To-Join technologies.
- Any meeting with recording scheduled will automatically be recorded.
- Share, play, or download the recorded meeting afterwards.
Simply put, SMSÂ and REC.VC remove the traditional cross-platform obstacles when scheduling, joining and recording a video meeting. And if you for any reason were not able to attend the meeting, you will always have the second-best option available, you can get up to speed by watching the recorded meeting on any device whenever convenient for you.
1. Technical Setup
Prerequisites:
- SMS installed|Download trial|More details
- REC.VC Enterprise Subscription|Free trial |More details
- MCU or VMR cloud: On-premises or cloud based private meeting platform such as Pexip or VMR cloud service like Videonor. Cisco Meeting Server will also do the trick.
- Endpoints and clients from Cisco, Pexip, Polycom, Videonor, StarLeaf, and/or Microsoft.
1.1 Microsoft Exchange
In Microsoft Exchange there needs to be added a new Resource for recordings. The Exchange Resource email address can e.g. be record@acme.com, and must allow for conflicting bookings.
1.2Â SMS
The same email used for the above Exchange Resource needs to be entered into the SMS Configurator:
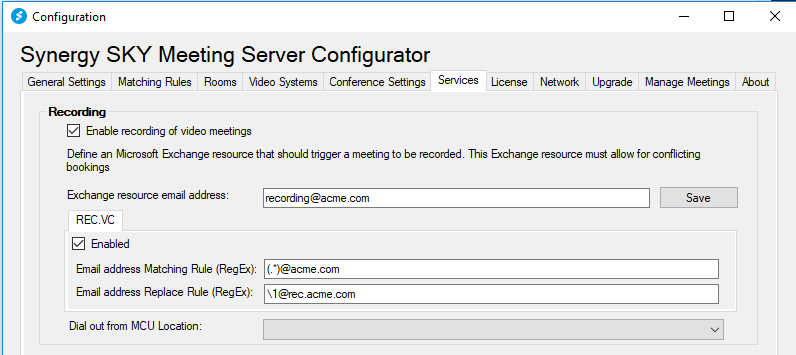
In addition, there needs to be Regex Rules defined to match the organizer of the meeting with his/her personal REC.VC recording address:
Matching rule: (.*)@acme.com
Replace rule: \1@.rec.acme.com
Rewrite example:
Meeting Organizer=john.smith@acme.com
REC.VC Recorder= john.smith@rec.acme.com
1.3 REC.VC
On the REC.VC side, every meeting organizer needs to have a REC.VC account with an associated recorder address, e.g. john.smith@rec.acme.com. This is best handled based on a SAML 2.0 integration between ACME’s authentication source and REC.VC, and will ensure SSO and auto-provisioning of accounts when users access the REC.VC user interface the first time.
2. Technical Workflow
- Schedule: Meeting organizer (john.smith@acme.com) creates a new Outlook invite and adds the Recorder Resource (recorder@acme.com) in addition to the People to be invited.
- Meet: People join the meeting using their prefered device or app. The Synergy SKY Meeting Server instructs ACME’s MCU to dial out from the VMR in question to the REC.VC recorder of the Meeting organizer (john.smith@rec.acme.com).
- Play: The meeting organizer accesses his/her REC.VC account to play, share or download the recorded meeting.

Posted in How to, New features, Record meeting Tagged with: One Button to Push, record meeting, schedule recording